Last updated on 2023-07-14, by
[3 Solutions] How to Burn ISO Image to USB?
In today’s digital age, ISO images have become an increasingly popular way to store and distribute large amounts of data. An ISO image is an exact replica of a CD, DVD, or Blu-ray disc, preserving the file system, folder structure, and all the files and metadata contained on the original disc. While ISO images can be directly accessed and mounted on a computer, there are situations where it becomes necessary to burn ISO images to a USB drive. This tutorial aims to provide a comprehensive guide on how to burn ISO images to USB drives on various operating systems, including Windows, Mac, and Linux.

Outline
You may also be interested in:
Part 1: What is an ISO Image?
An ISO image is not only a mere replica of the content of an optical disc but also serves as a versatile and efficient means of preserving and distributing data. It captures the entire file system structure, encompassing directories, files, and metadata present on the original disc. This comprehensive representation makes ISO images invaluable for various purposes such as software distribution, system backups, and the creation of bootable media.
Software developers often rely on ISO images to distribute their software to end-users. By packaging all the necessary files and directories into a single ISO image, developers can ensure that users receive a complete and intact copy of the software. It simplifies the installation process, as users only need to mount or burn the ISO image to access the software’s content. Moreover, ISO images eliminate the need for physical media, such as CDs or DVDs, streamlining the distribution process and reducing production costs.
Part 2: Why Do You Need to Burn ISO Image to USB?
1.Portability
USB drives are highly portable and can be easily carried in your pocket or bag. By burning an ISO image to a USB drive, you can conveniently access your data on any computer with a USB port, without the need for an optical disc drive. This portability is particularly useful when working on different computers or when on the go.
2.Convenience
USB drives provide a more convenient solution compared to optical discs. With a USB drive containing a burned ISO image, you can quickly and easily access your data without the hassle of carrying multiple discs or dealing with disc swapping. USB drives offer instant access to the ISO image’s content and eliminate the need for installing software or navigating physical media.

3.Larger Storage Capacity
USB drives offer significantly larger storage capacities than optical discs. This enables you to store multiple ISO images on a single USB drive, allowing for efficient organization and accessibility of your data. USB drives can hold several gigabytes to terabytes of data, providing ample space for various ISO images, software distributions, or system backups.
4.Bootable Media
Burning an ISO image to a USB drive allows you to create bootable media. Bootable USB drives enable you to start up a computer directly from the USB drive, bypassing the installed operating system. This functionality is crucial for tasks such as installing or upgrading operating systems, running live environments for troubleshooting or system recovery, or performing system repairs. Bootable USB drives offer faster access times and greater flexibility compared to booting from optical discs.
Part 3: How to Burn ISO to USB on Windows?
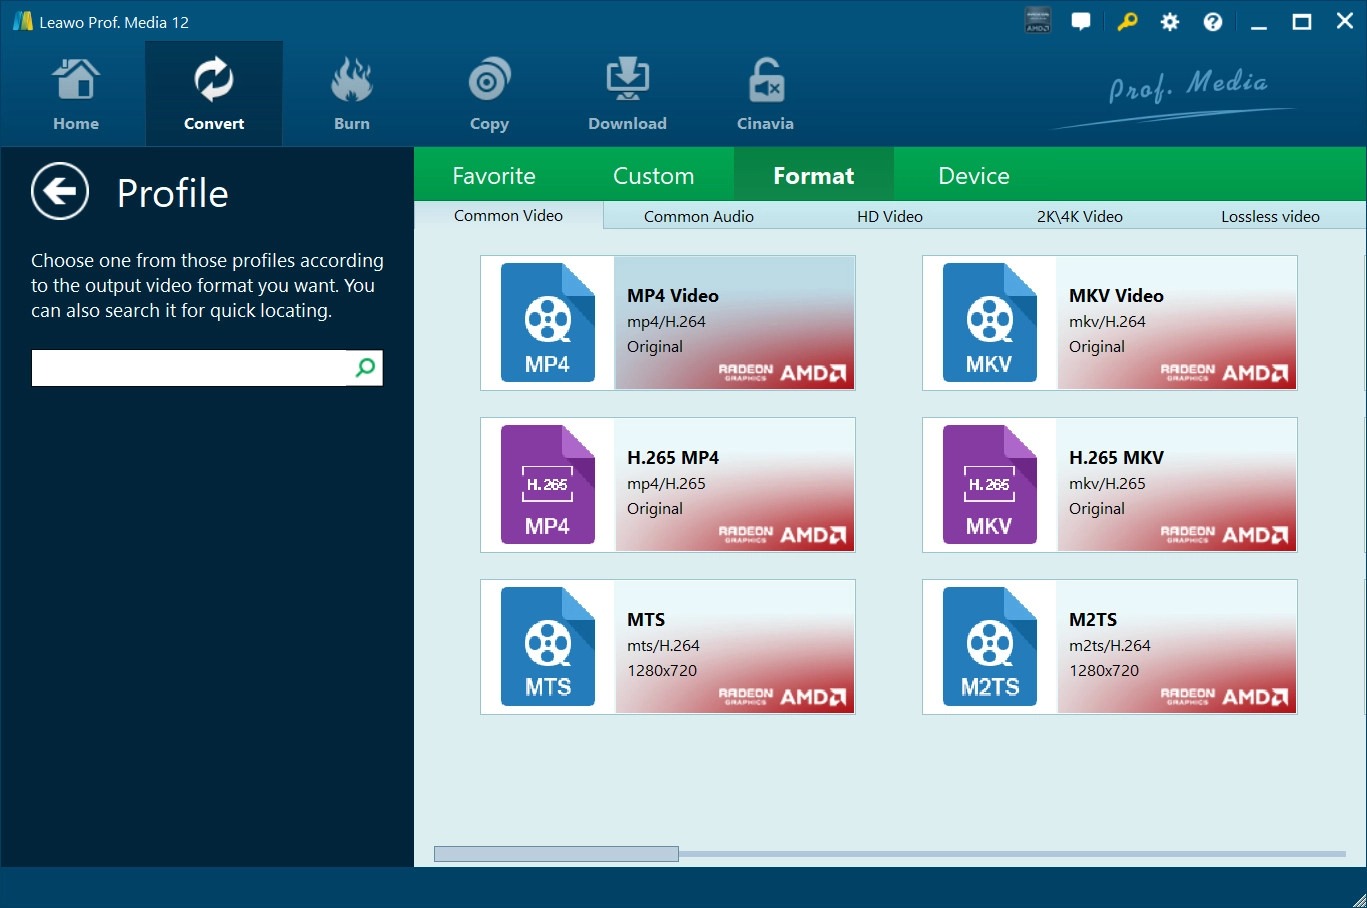
When it comes to burning ISO images to USB drives on Windows, there are several methods available. One highly recommended tool for this purpose is Leawo Blu-ray Creator. Leawo Blu-ray Creator is a comprehensive and user-friendly software that enables easy burning of ISO images to USB drives. The following steps outline the process:
1.Download and install Leawo Blu-ray Creator from the official website. Ensure you choose the appropriate version for your Windows operating system.

-
Leawo Blu-ray Creator
Burn videos to Blu-ray/DVD disc, folder and/or ISO image file simultaneously
Create photo slideshows from various photos and burn to DVD/Blu-ray disc easily.
One click operation to burn ISO image file to Blu-ray/DVD disc.
Edit output videos to add image or text watermark, trim video size, adjust effect, etc.
Create 3D Blu-ray/DVD movies with 6 different 3D effects.
2.Launch the program and insert the USB drive into your computer’s USB port.
3.Click on the “Burn” tab in Leawo Blu-ray Creator’s interface, then select “Add Video” to import the ISO image you wish to burn.

4.Choose the USB drive as the output destination for the burned ISO image. Adjust the burning settings according to your preferences, such as setting the disc label and selecting the desired video quality.
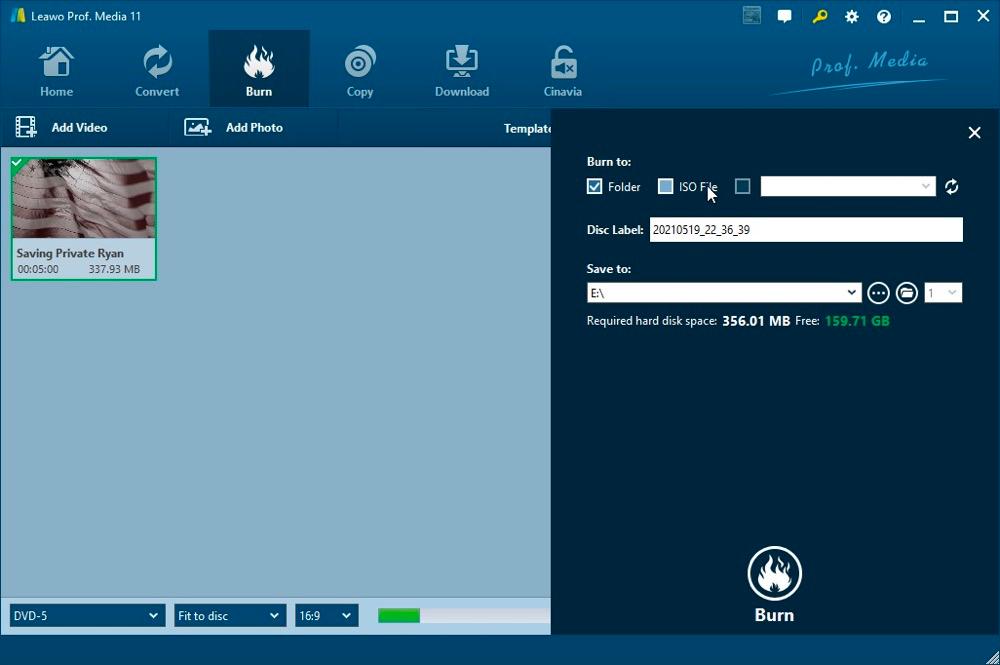
5.Before proceeding, double-check that all settings are accurate, and then click on the “Burn” button to initiate the ISO burning process.
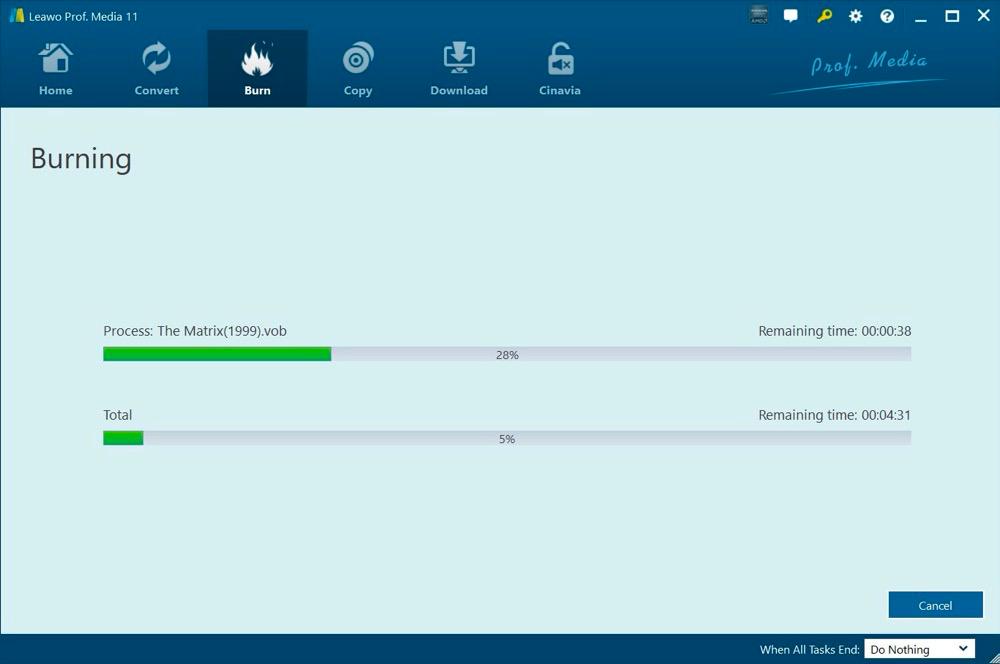
6.Once the burning process is complete, safely eject the USB drive from your computer.
Part 4: How to Burn ISO to USB on Mac?
Mac users can burn ISO images to USB drives using the built-in Disk Utility application. Disk Utility is a versatile tool that provides various disk-related functions, including burning ISO images. The following steps demonstrate how to burn ISO images to USB drives on a Mac:
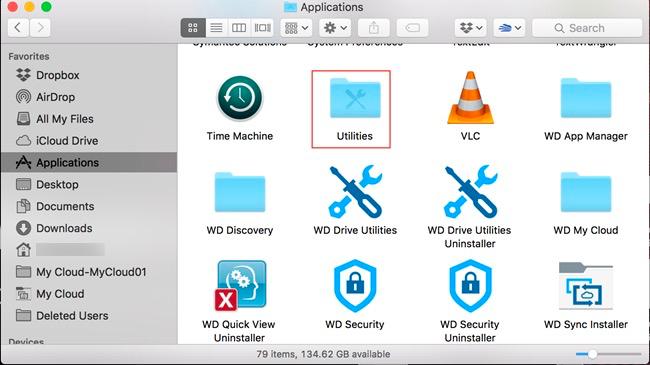
1.Connect the USB drive to your Mac’s USB port. Open Disk Utility, which can be found in the “Utilities” folder within the “Applications” folder.
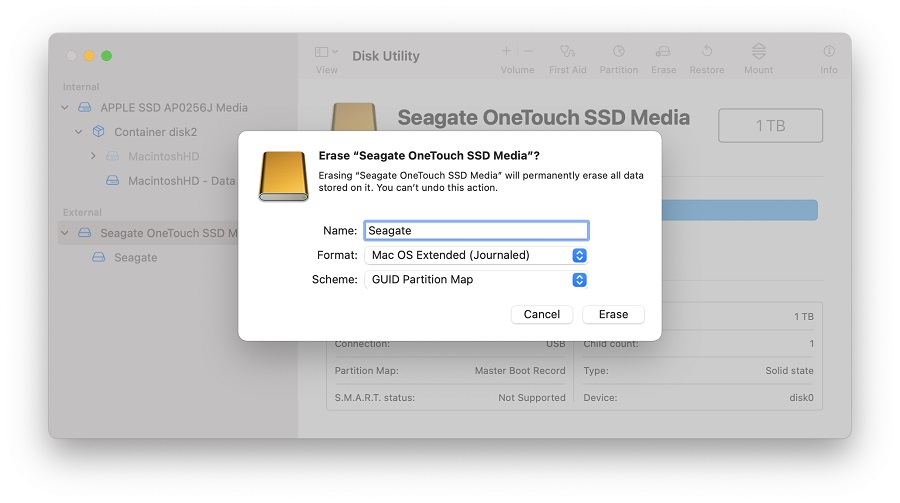
2.In the Disk Utility interface, select the USB drive from the list of available drives.
3.Click on the “Erase” tab, then choose the appropriate format for the USB drive, typically “Mac OS Extended (Journaled)”. Provide a name for the USB drive and click on the “Erase” button to format it.
4.Once the formatting process is complete, go to the “File” menu and select “Burn Disk Image”.
5.Locate and select the ISO image you want to burn onto the USB drive. Click on the “Burn” button to initiate the burning process.
6.Wait for the process to complete, and once finished, safely eject the USB drive from your Mac.
Part 5: How to Burn ISO to USB on Linux?
Linux provides a powerful command-line tool called “dd” that can be used to burn ISO images to USB drives. The following steps outline the process of burning ISO images to USB drives on a Linux system:
1.Connect the USB drive to your Linux machine’s USB port. Open the terminal application on your Linux system.
2.Use the “lsblk” command to identify the device name assigned to your USB drive. The command will display a list of all available drives, and you need to locate the entry corresponding to your USB drive (e.g., /dev/sdb).
3.Ensure that the USB drive is unmounted before proceeding. To unmount the USB drive, run the command “umount /dev/sdb” (replace /dev/sdb with the appropriate device name).
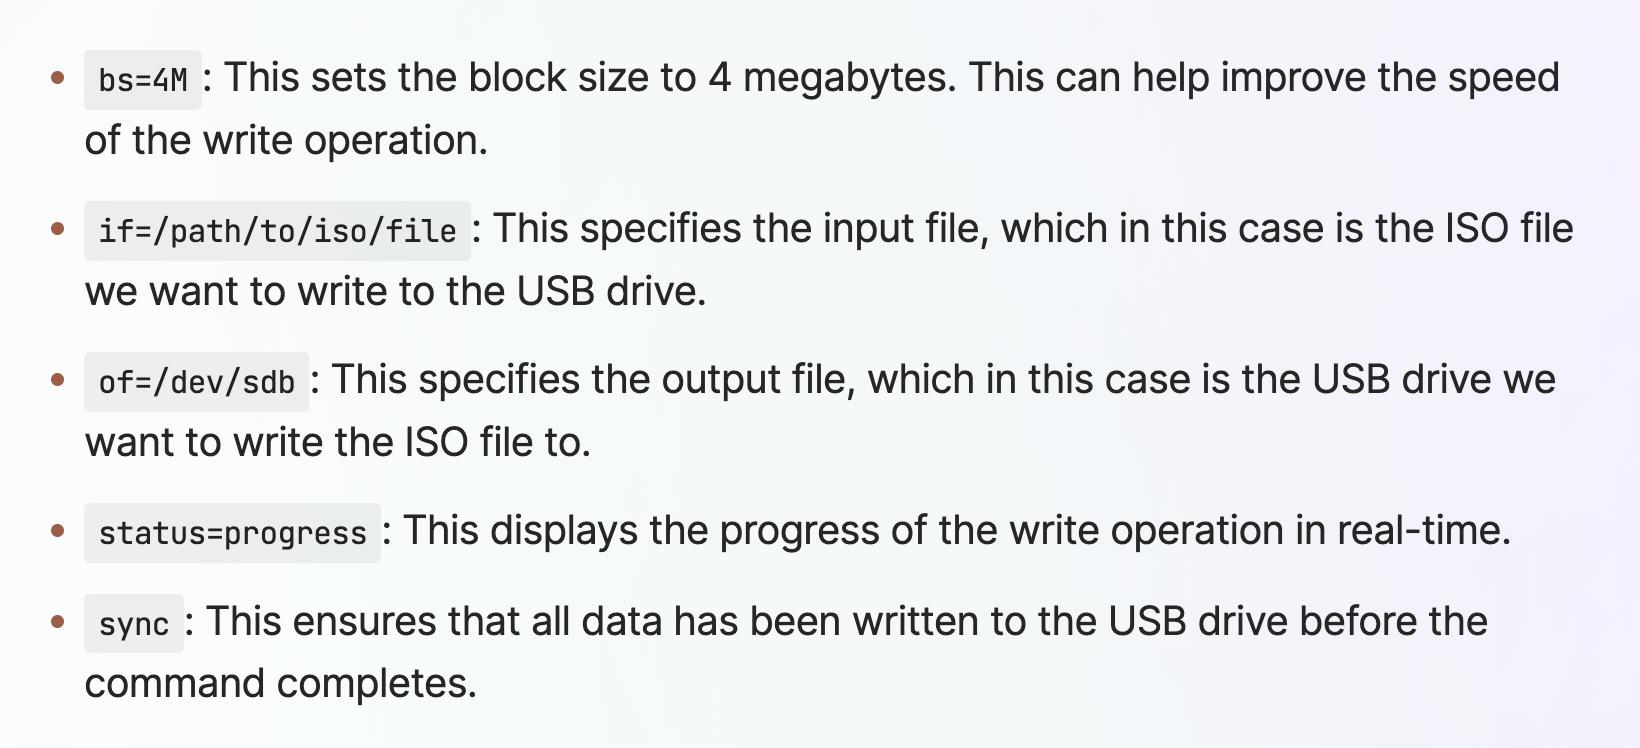
4.Execute the following command to burn the ISO image to the USB drive: “sudo dd bs=4M if=/path/to/isoimage.iso of=/dev/sdb status=progress && sync” (replace /path/to/isoimage.iso with the actual path to the ISO image and /dev/sdb with the appropriate device name).
5.Wait for the process to complete, and once finished, the ISO image will be successfully burned to the USB drive. Finally, safely eject the USB drive from your Linux machine.
You may check the breakdown of the different parts of the dd command we used to write an ISO file to a USB drive here:
Closing
Burning an ISO image to a USB drive provides enhanced accessibility, portability, and the ability to create bootable media. In this essay, we explored the concept of ISO images and discussed the reasons why burning them to USB drives is necessary. Additionally, we provided detailed step-by-step guides for burning ISO images to USB drives on Windows, Mac, and Linux operating systems. By following these instructions, you will be equipped to efficiently burn ISO images to USB drives, allowing you to take full advantage of this versatile storage and distribution method!
-

How to Burn ISO to DVD on Windows/Mac with Ease?Cassie/2024-07-05
-

6 Best ISO Creators to Create ISO Files from DVDCassie/2024-11-13
-

8 Best Free DVD Player for Windows/Mac to Help You Play DVDsCassie/2024-07-05
-

[100% Solved]How to Rip Blu-ray to MKV & Burn MKV to Blu-rayPatrick/2024-07-04
-

Can a Blu-ray Player Play 4K Movies?Leia/2024-07-04
-

Best Ways to Play Blu-ray Discs from Any RegionPatrick/2024-06-18
-

How to Open & Play ISO Files with Ease?Cassie/2024-06-04
-

How to Play VOB Files on Mac Without Errors?Cassie/2024-06-04
-

QLED vs. UHD: Which One is Better?Cassie/2024-06-04
-

New Releases Movies for Redbox StreamingPatrick/2024-05-21
-
10 Best Sites to Watch Blu-ray Movies OnlineValyn/2022-11-24
-

How to Screen Record on Mac & Further TipsCassie/2023-05-17
-

Can VLC Play DAV File & How to?Vinho/2022-12-30
-
[4 Solutions] How to Play M3U Files?Vinho/2023-02-14
-
How to Convert Video_TS to MP4 with Video_TS to MP4 Converters?Vinho/2023-09-11
-
[Proved] How to Copy DVD to USB Drive?Vinho/2023-05-19
-

12 Best DVD Decrypter Software in 2022 to Convert DVDValyn/2022-11-23
-
Top 10 Blu-ray to MP4 Converters in 2023Cassie/2023-05-18
-
QLED vs. UHD: Which One is Better?Cassie/2024-06-04
-
Best Ways to Play Blu-ray Discs from Any RegionPatrick/2024-06-18